This setting adjustment applies to Pro 4 Rev 2 cameras and will optimize image quality on NTSC and PAL cameras.
Connect the ROV to the operator control console (OCC), power on the ROV and open the Cockpit software. Click ‘Menu’ in the Main Camera instrument to open the IRIS menu.

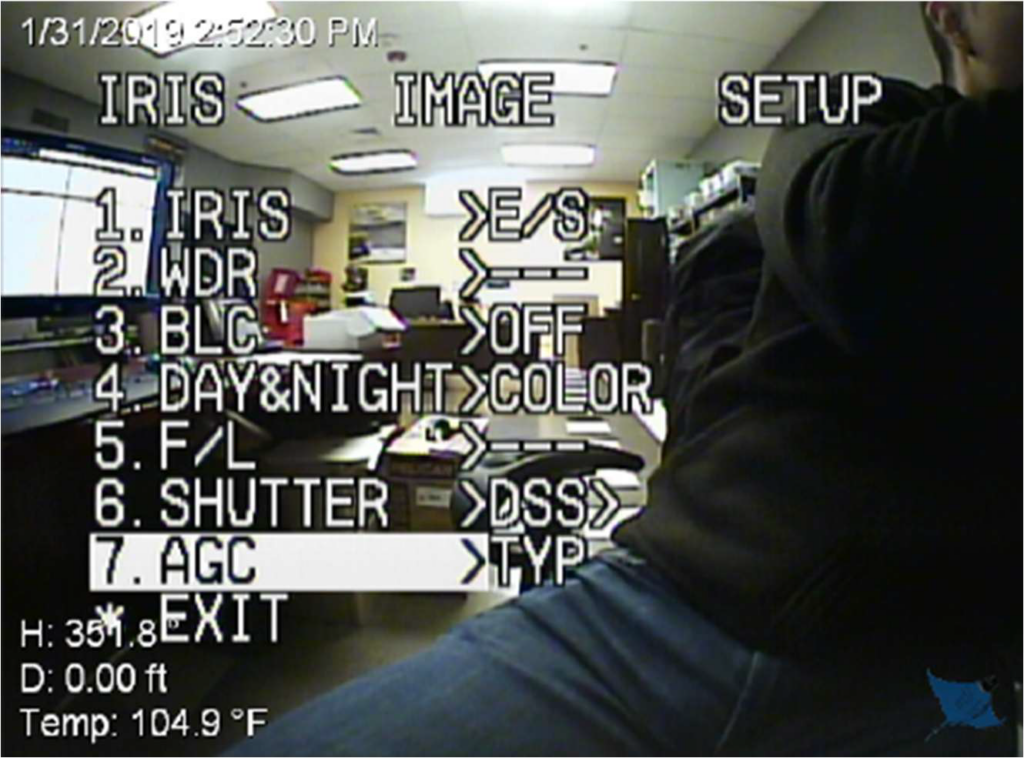
Under the IRIS main menu, press the down arrow on the keyboard to select
‘IRIS’ option. Change the setting to “E/S” by pressing the right arrow on the
keyboard.
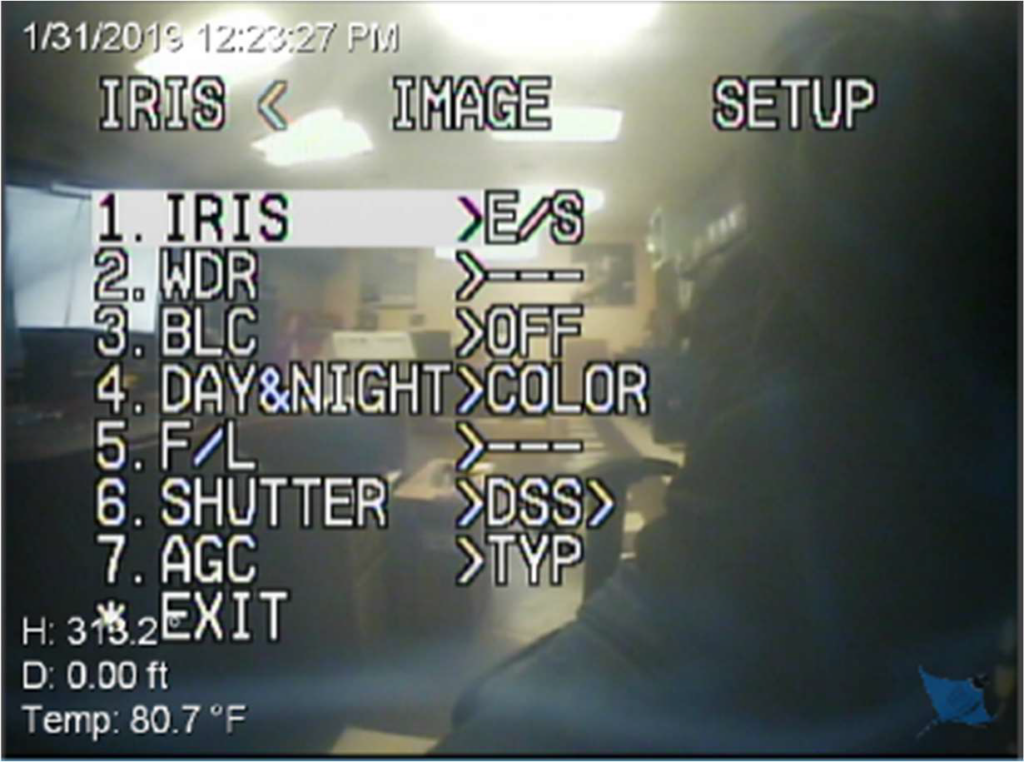
Press the down arrow on the keyboard to select “WDR” option. Setting should
have 3 dashes.
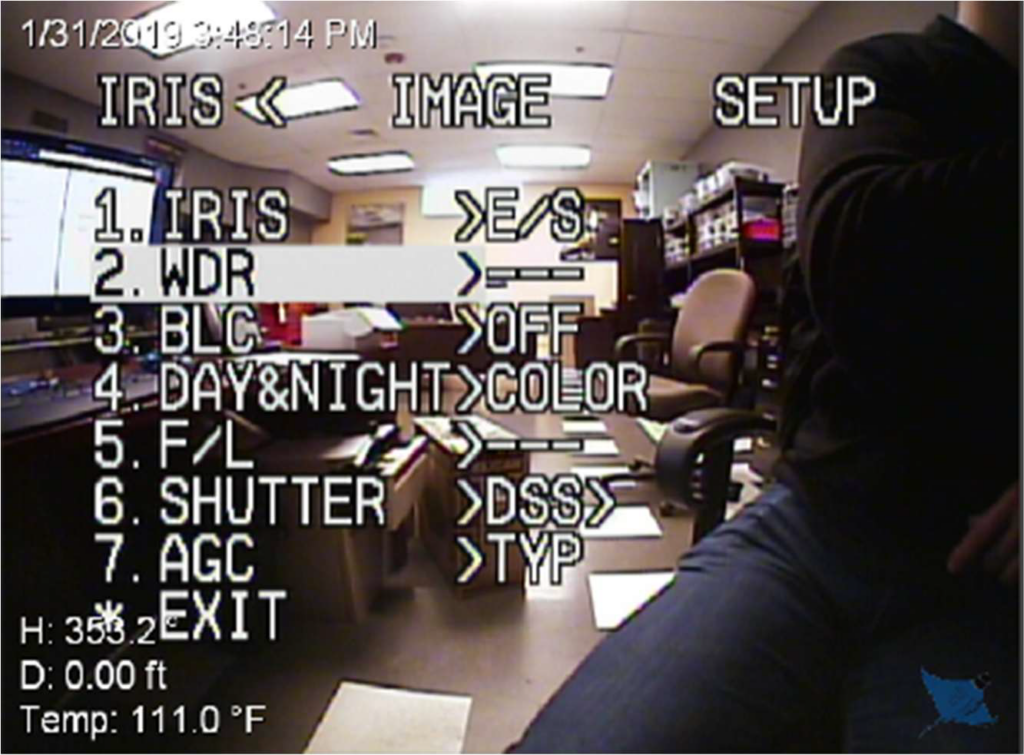
Press the down arrow on the keyboard to select “BLC” option. Change the setting
to “OFF” by pressing the right arrow on the keyboard.
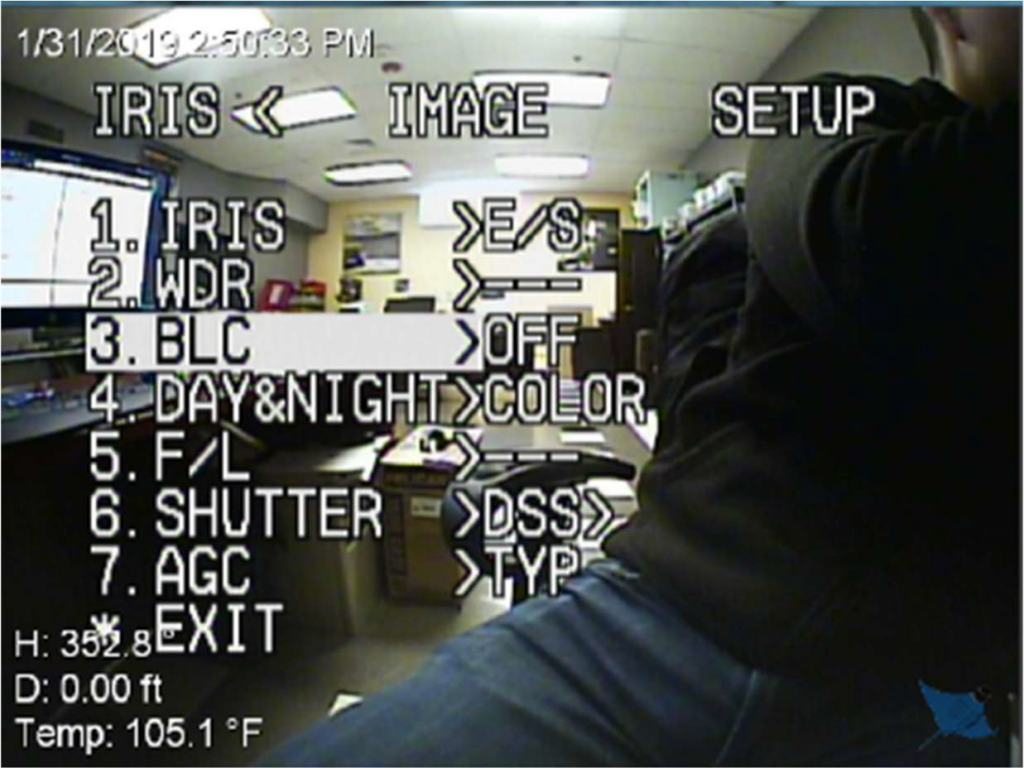
Press the down arrow on the keyboard to select “Day&Night” option. Change the
setting to “Color” by pressing the right arrow on the keyboard.
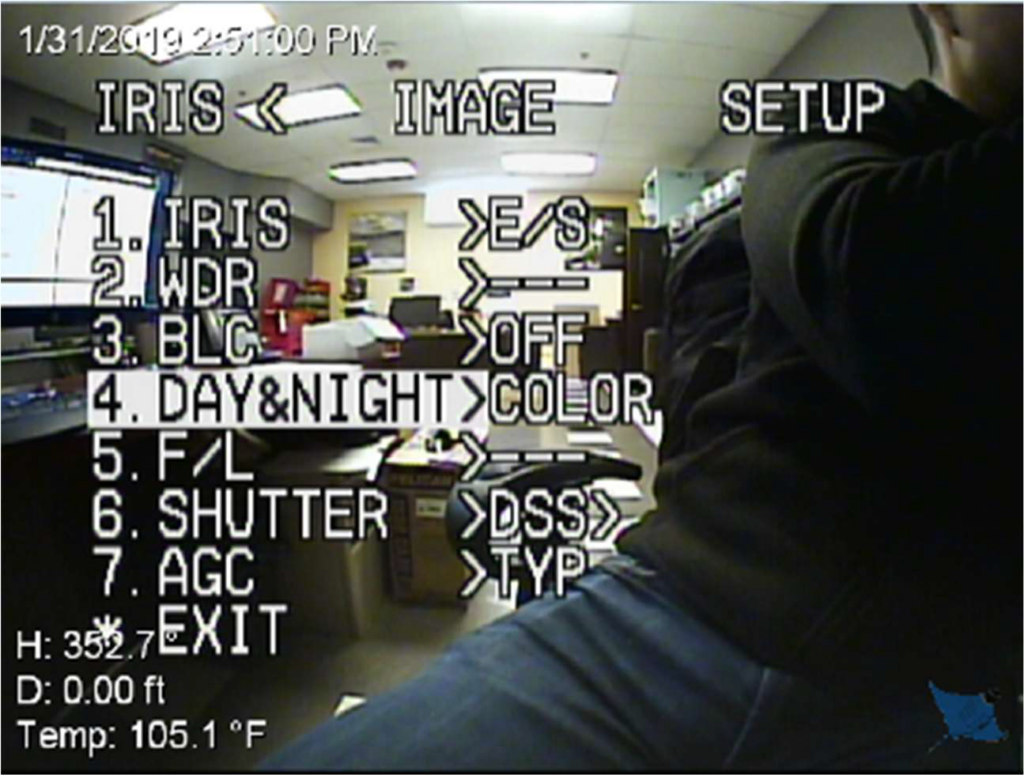
Press the down arrow on the keyboard to select “F/L” option. Setting should have
3 dashes.
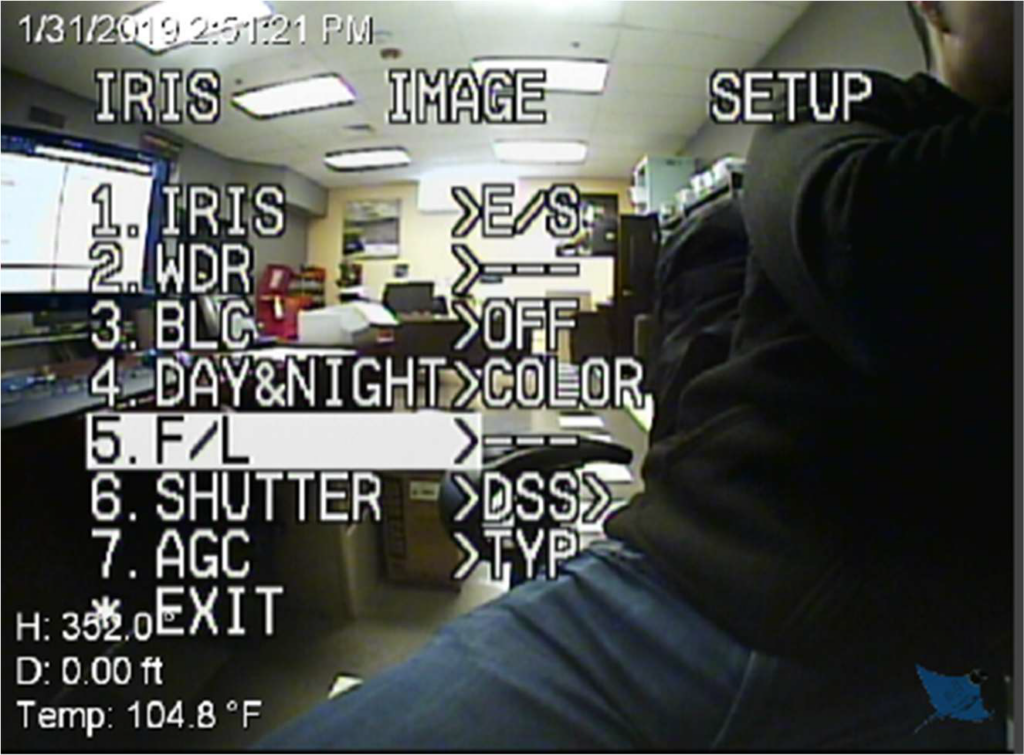
Press the down arrow on the keyboard to select “Shutter” option. Setting should
be set to “DSS”.
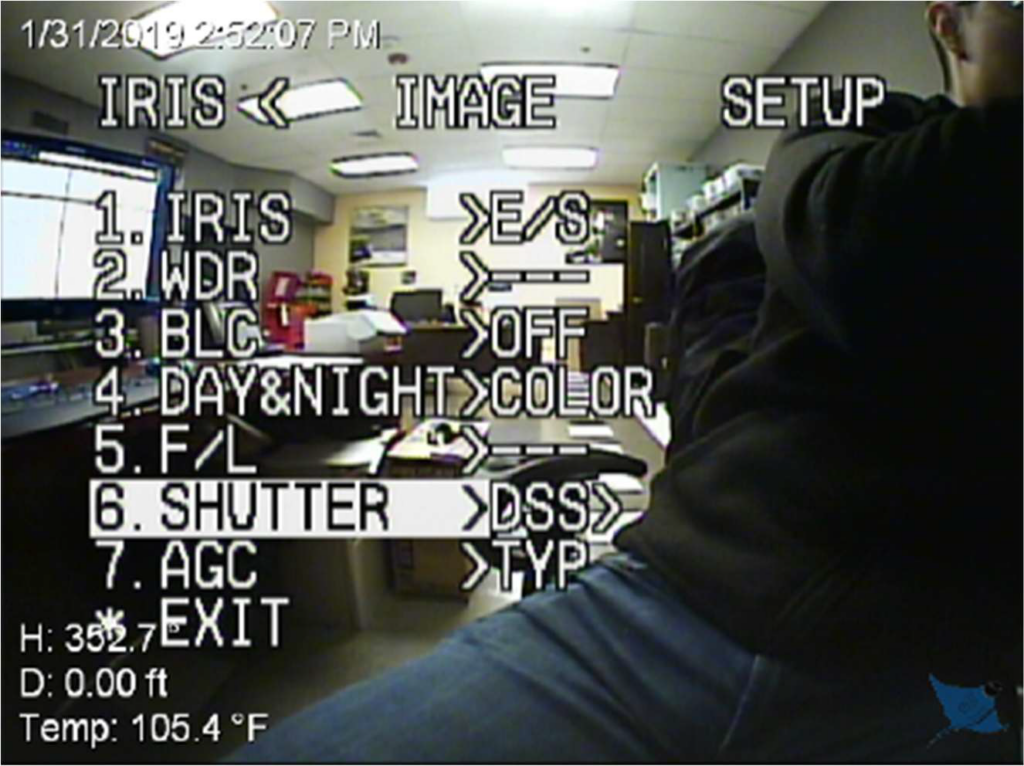
Press the down arrow on the keyboard to select “AGC” option. Change the setting
to “TYP” by pressing the right arrow on the keyboard.
Press the down arrow on the keyboard to go up to the main menu. Select “Image”
by pressing the right arrow on the keyboard.
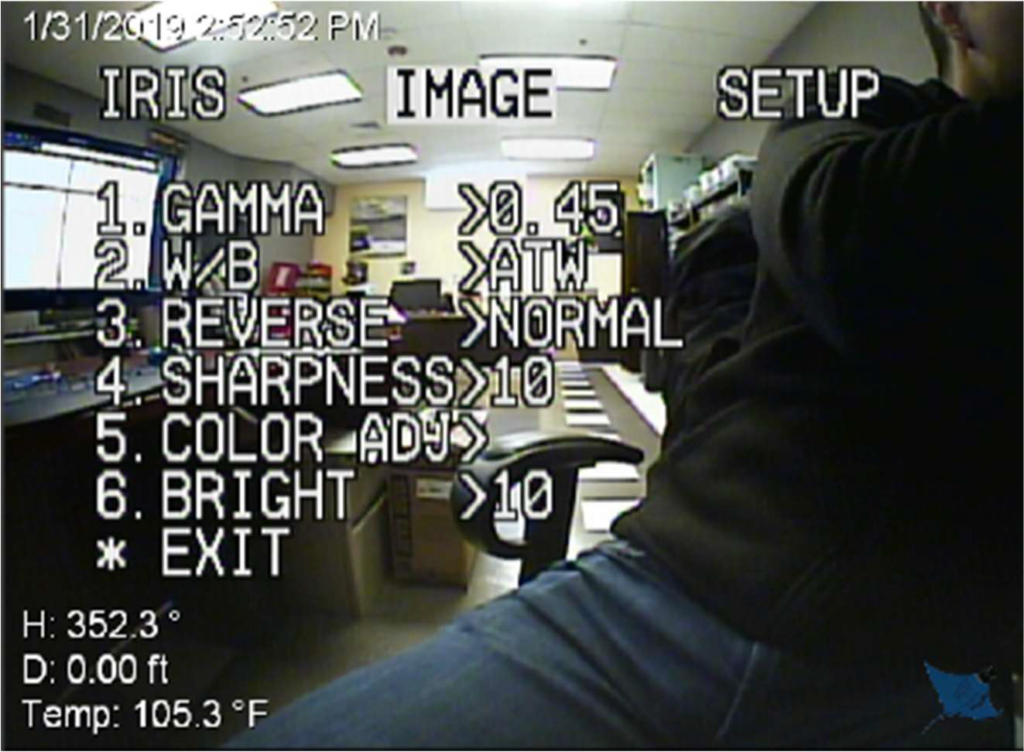
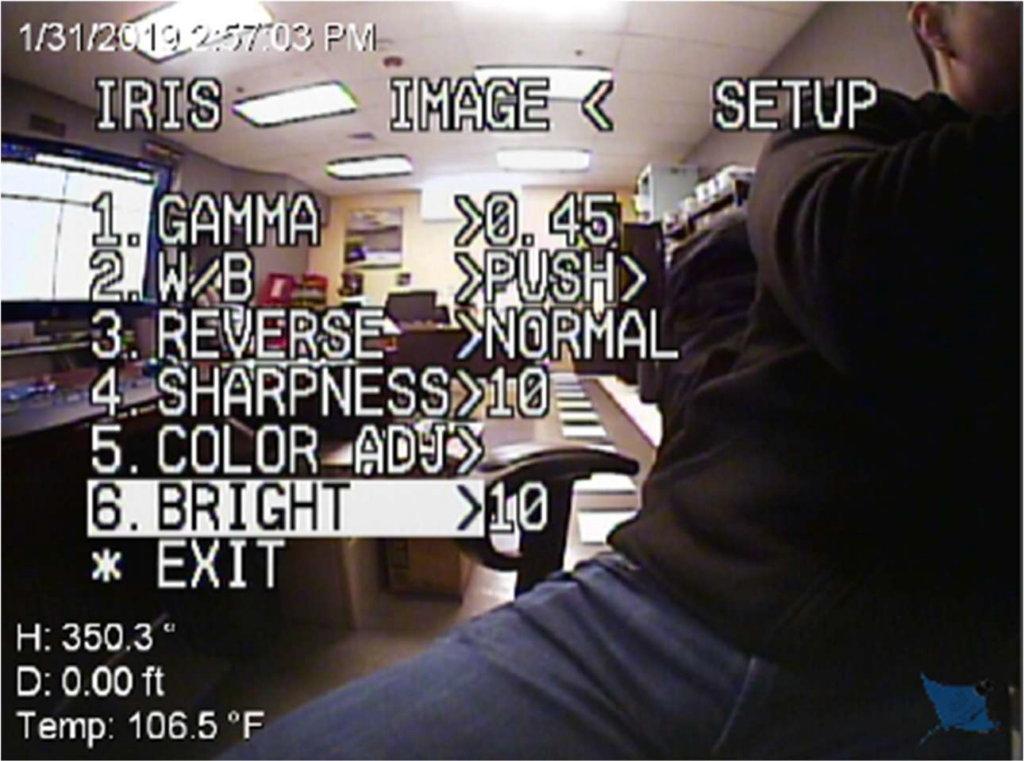
Press the down arrow on the keyboard to select “Gama” option. Change the
setting to “.45” by pressing the right arrow on the keyboard.
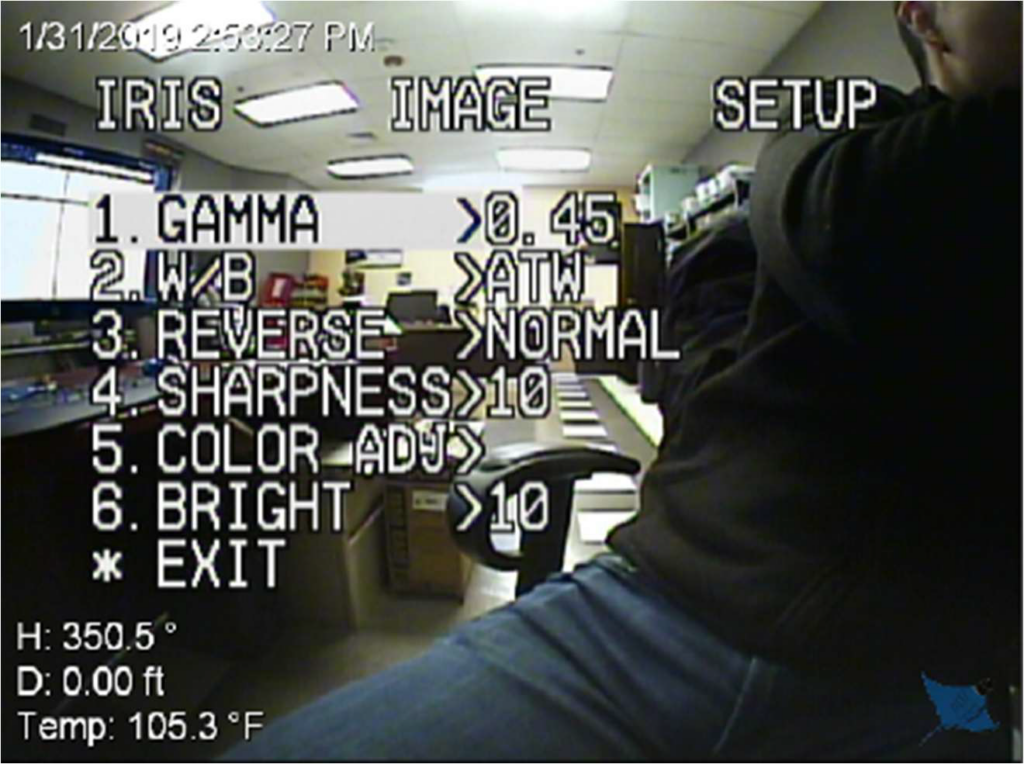
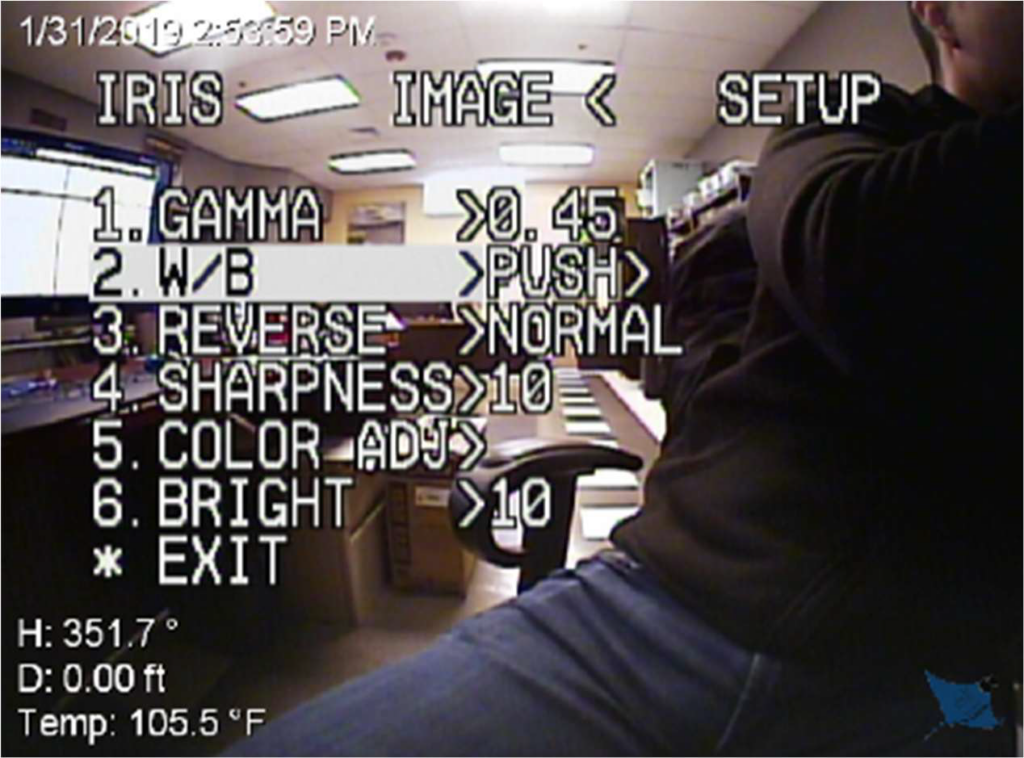
Press the down arrow on the keyboard to select “W/B” option. Change the setting
to “Push” by pressing the right arrow on the keyboard.
Press the down arrow on the keyboard to select “Reverse” option. Change the
setting to “Normal” by pressing the right arrow on the keyboard.
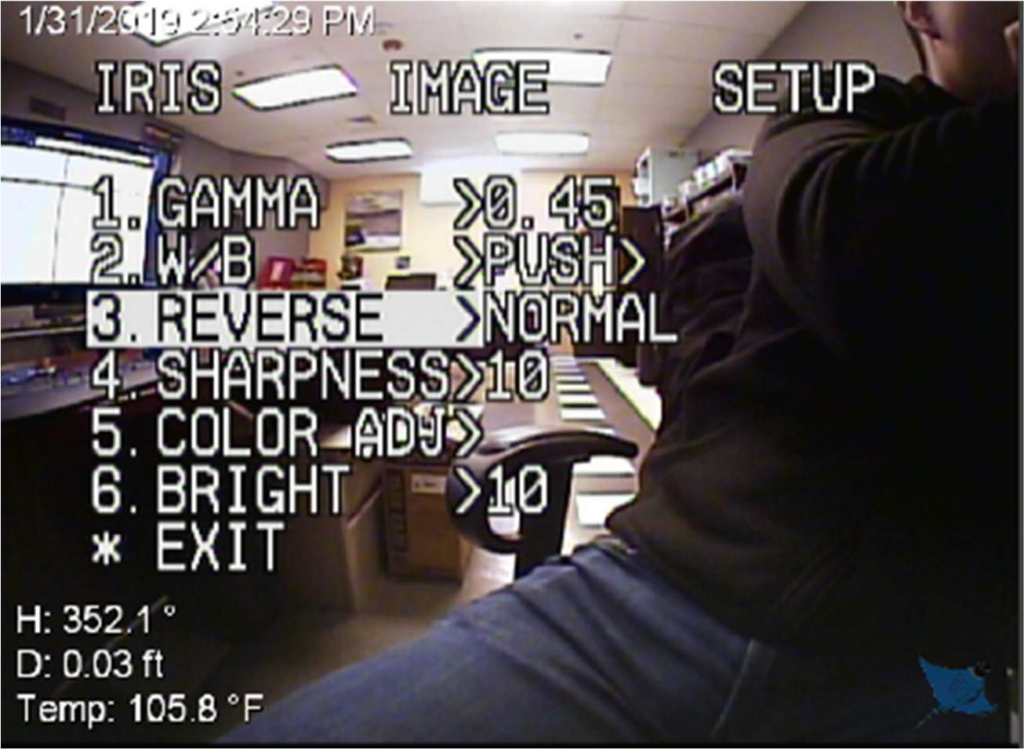
Press the down arrow on the keyboard to select “Sharpness” option. Change the
setting to “10” by pressing the right arrow on the keyboard.
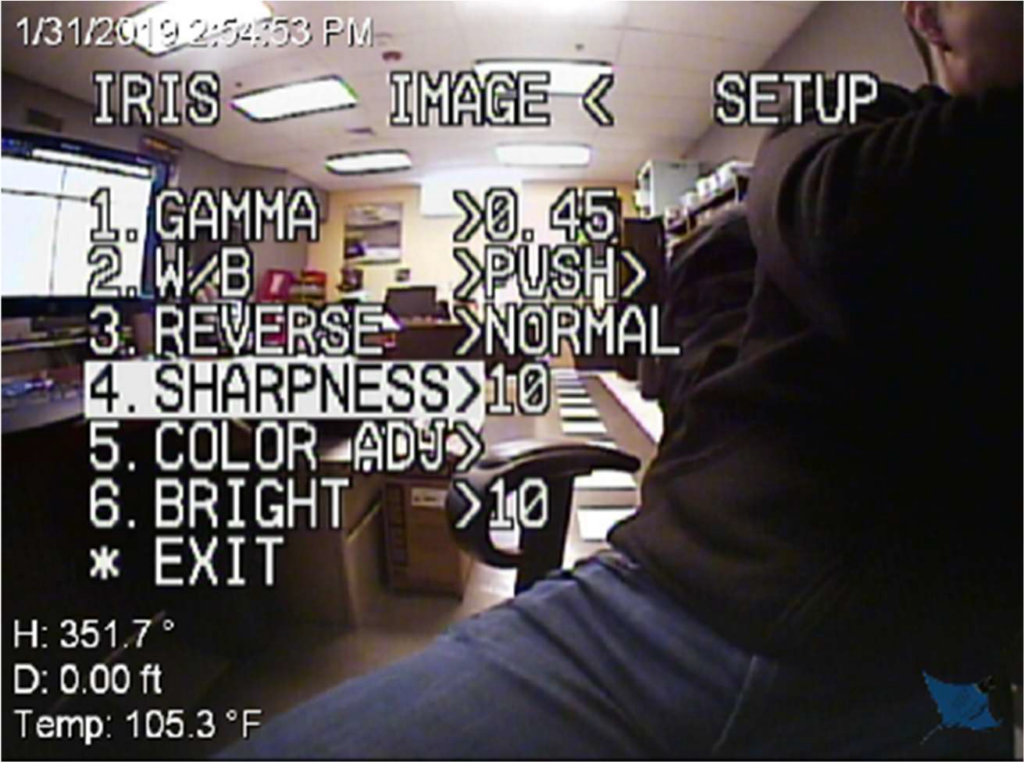
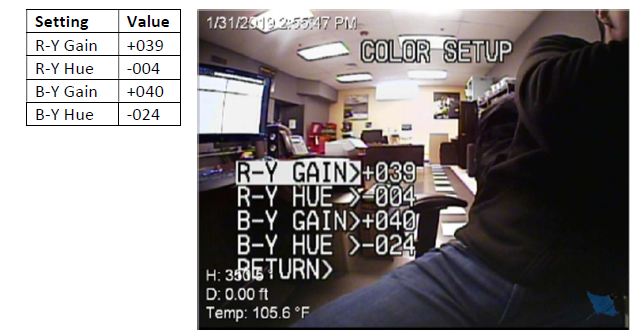
Press the down arrow on the keyboard to select “Color ADJ” option. Press the
space bar to access the settings.
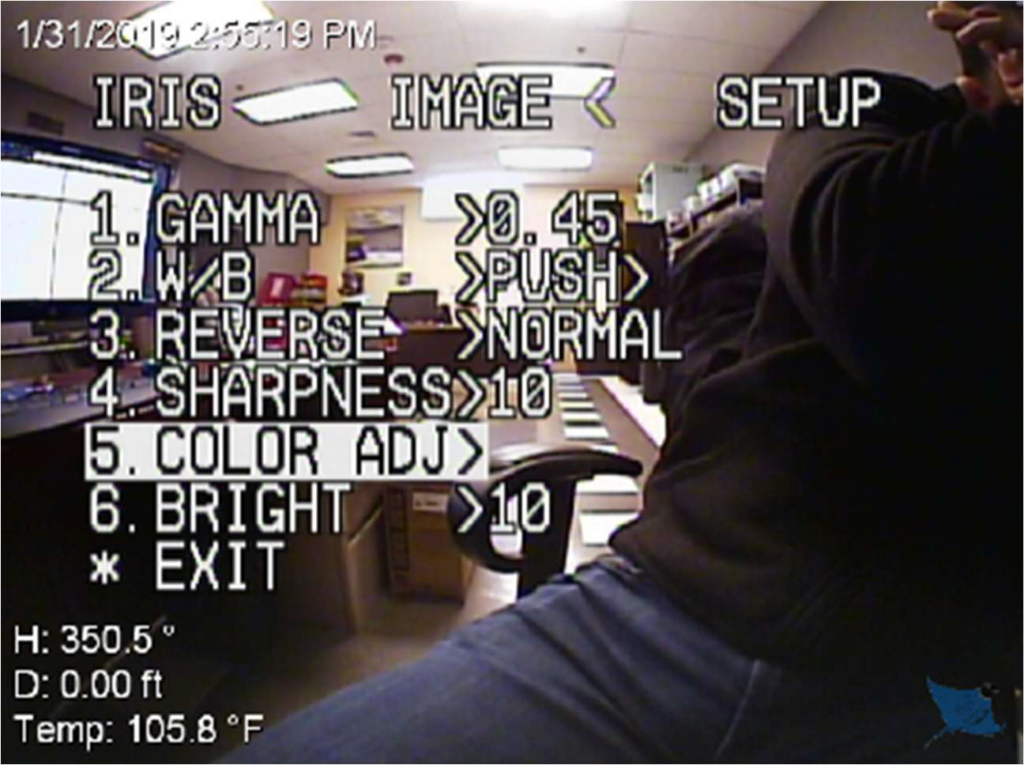
Adjust the settings to the values provided below by selecting each option with the
down arrow and adjusting with the right arrow on the keyboard. To exit, select the
“Return” option and press the space bar on the keyboard.
Press the down arrow on the keyboard to select “Bright” option. Change the
setting to “10” by pressing the right arrow on the keyboard.
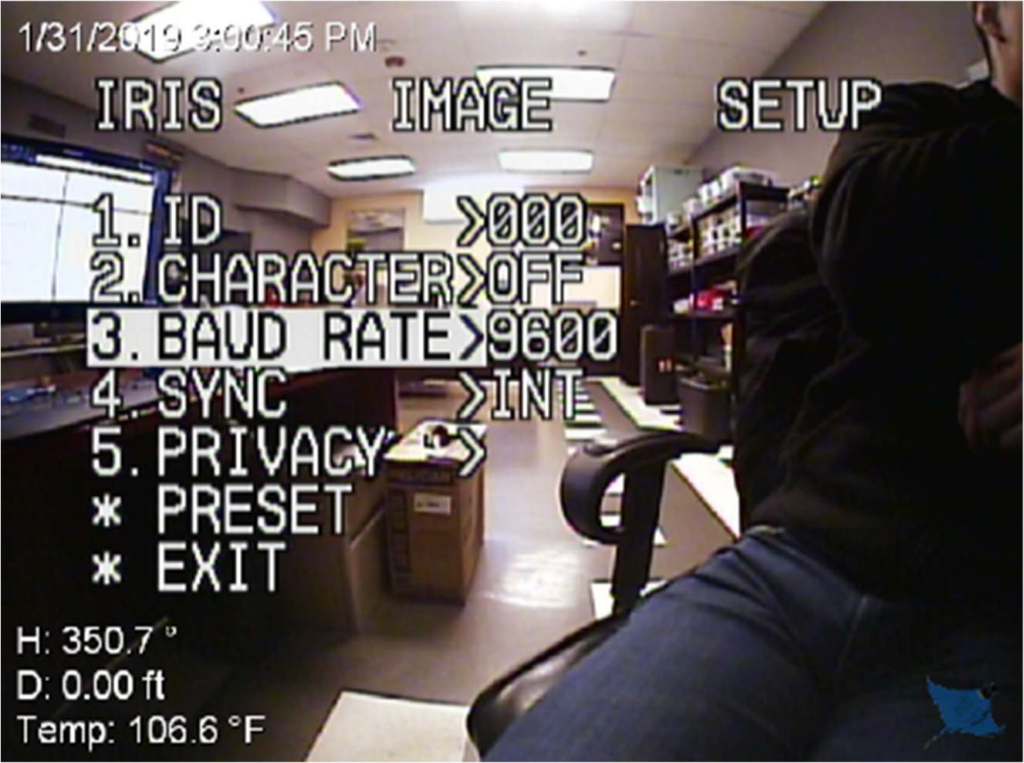
Press the down arrow on the keyboard to go up to the main menu. Select “Setup”
by pressing the right arrow on the keyboard.
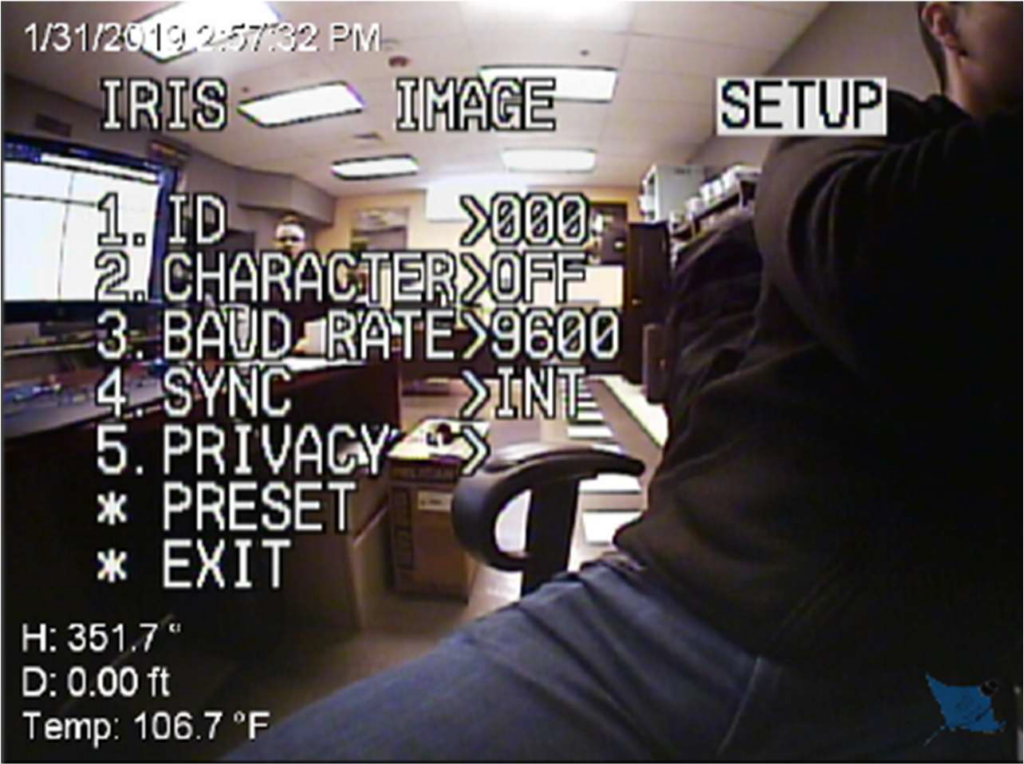
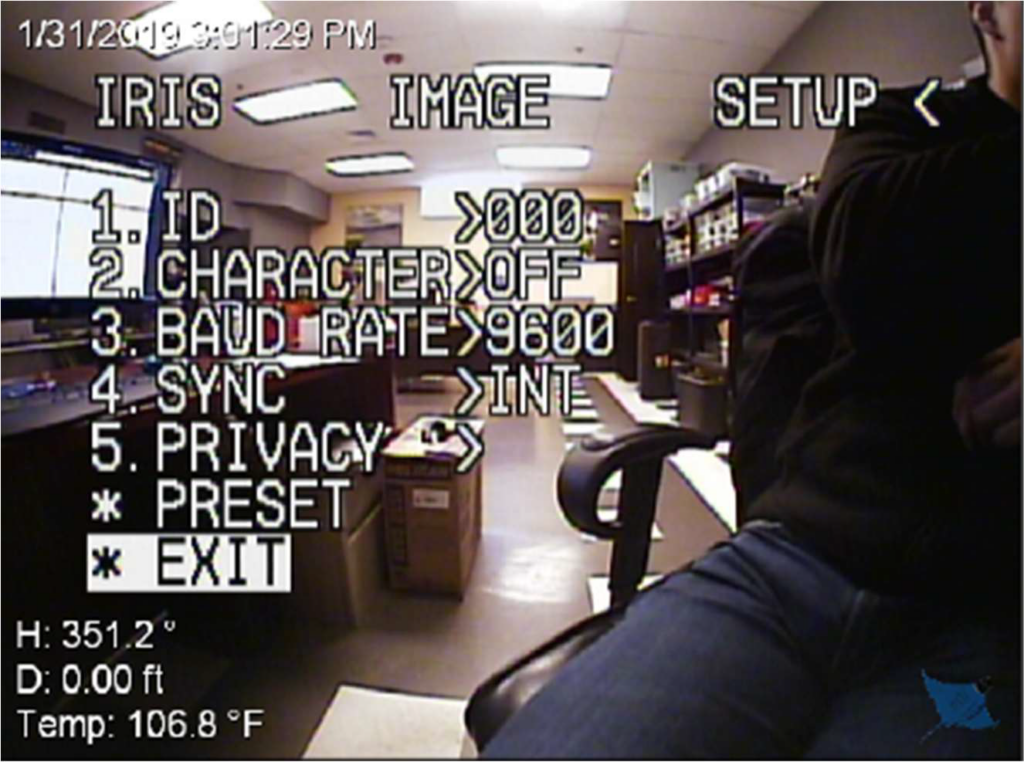
Press the down arrow on the keyboard to select “ID” option. Change the setting to
“000” by pressing the right arrow on the keyboard.
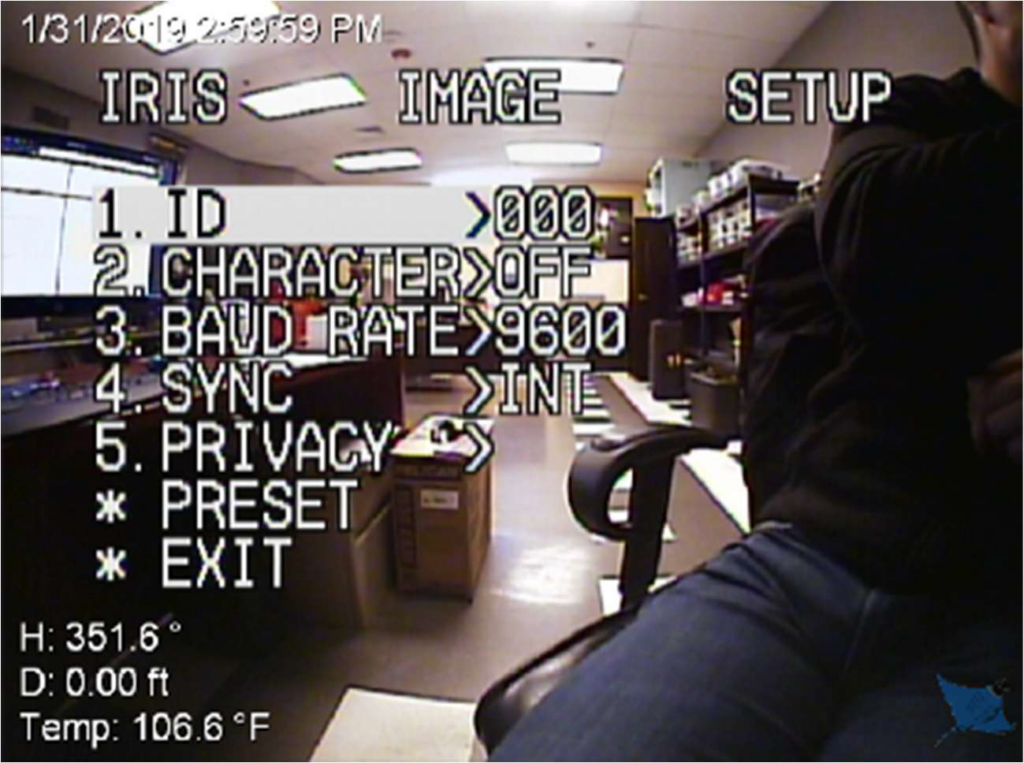
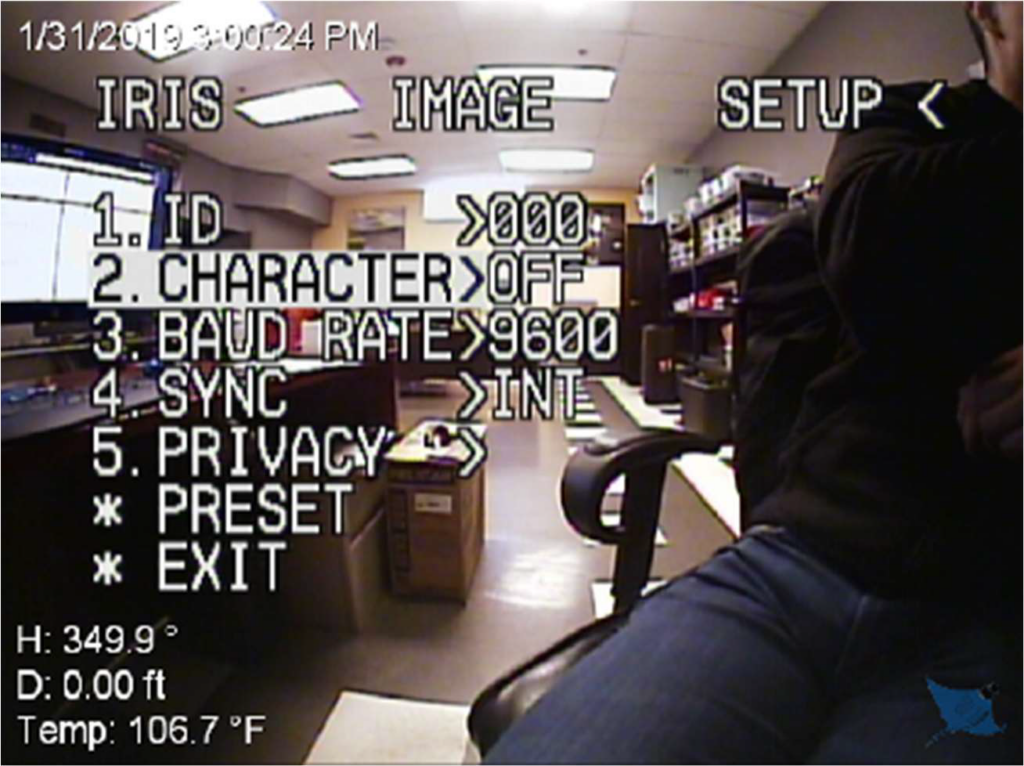
Press the down arrow on the keyboard to select “Character” option. Change the
setting to “OFF” by pressing the right arrow on the keyboard.
Press the down arrow on the keyboard to select “Baud Rate” option. Change the
setting to “9600” by pressing the right arrow on the keyboard.
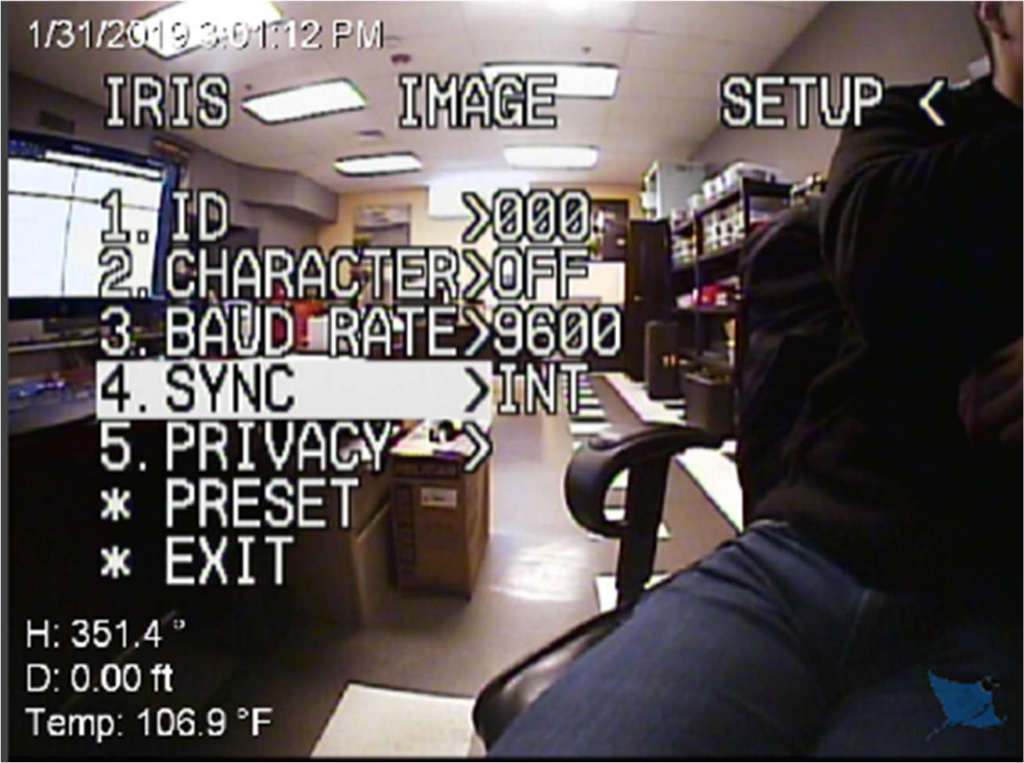
Press the down arrow on the keyboard to select “Sync” option. Make sure its set
to “INT”.
Press the down arrow on the keyboard to select “Exit” option. Press the space bar
to exit the menu.